Showing posts with label tutorial. Show all posts

Tuesday, September 25, 2012

Phototutorial: Coffee Time.

I haven't done a tutorial in a while.  I've been busy between my two jobs, and whereas I miss you guys, I am really, really tired, haha.


I only used one brush!  This is the SOHO Smudge Brush from my Myglam/Ipsy Bag.  I used Madd Style Cosmetix pigments in Adipose, Xray Spex, Dirty Chai, Americano and Fresh Pots.  I used my Eyeko Skinny Liner in Black, my Urban Decay 24/7 Glide On Pencil in Whiskey and MAC's eye kohl in Fascinating.  I also used my Urban Decay Primer Potion in Sin, and Makeup Forever's Smoky Lash in Brown.

Monday, July 16, 2012

TUTORIAL: YSL Nails Inspired!

Today I got home from work and decided I wanted to do a look.  I couldn't think of anything I was nuts to do, and since my requests document is on my dead computer, I grabbed April's issue of Glamour and flipped through it.  I found an image for YSL fingernail polish, and fell in love with the combination of a cool green, an orange, a cool pink, and black.

The supplies:

+ Madd Style Cosmetix pigments in Birfday Suit, Mushroom Jazz, Bang! Bang! and Frankenstein [V, CF]
+ NYX Jumbo Eye Pencil in Milk
+ Blinc Mascara [V, CF]
+ Lancome Le Curler
+ Madd Style Cosmetix Fireworks lip bomb [V, CF]
+ Shiro Cosmetics Forty Cakes Intertube [V, CF]

Not pictured:
+ Korres Anti-aging Eye Primer
+ Urban Decay 24/7 Liner in Zero [V, CF]
+ ELF Contour Brush
+ ELF Concealer Brush
+ Sedona Lace #305  Brush
+ Crown #C407 Jumbo Shadow Brush

Gather your supplies and meet me after the jump...

Tuesday, July 10, 2012

TUTORIAL: Monster Inspired!

Nearly a year ago, the lovely Karyl of the Biting Gnome sent me a love package.  In that package was a precious monster who is one of the cutest little things I've laid my eyes on... and tonight I decided to do a tutorial based on him because I asked j0hn to pick an object for inspiration.  =] 

So let's get into the supplies:


In order of use:
MTcoffinz Under the Rainbow Eyeshadow Primer [V, CF]
Madd Style Cosmetix pigment in Love Potion No. 9 [V, CF]
Madd Style Cosmetix pigment in Outlaw Star [V, CF]
Madd Style Cosmetix pigment in Birfday Suit [V, CF]
Madd Style Cosmetix Awesome Sauce Foiling Medium [V, CF]
Madd Style Cosmetix pigment in Atomic Dreamland [V, CF]
Urban Decay 24/7 Glide On Pencil in Zero [V, CF]
blinc Mascara [V, CF]

& the brushes (left to right):
Sedona Lace Midnight Lace Synthetic Brush #305
Real Techniques Deluxe Crease Brush
Real Techniques Base Shadow Brush
Real Techniques Pixel-Point Eyeliner Brush
ELF Flat Liner Brush

To see my look inspired by the little monster...

Tuesday, June 26, 2012

TUTORIAL: Summer Lovin' Look with Madd Style Cosmetix!

I recently received my grab bag from Madd Style Cosmetix and fell so in love with the products inside that I was compelled to immediately apply ALL of them to my face.  I'm not kidding.  Before I started on my eyes, I already had the Frenchie lip bomb on my lips and the Cha Cha bronzer on my cheeks as a pretty blush.


Please note that my eyes are already primed at this point, as well.  Let's get started with supplies.


We have here the Korres Antiaging Eye Primer, the Sleek Primer Palette, pigments from Madd Style Cosmetix in the colors Kozmosis, T-Birds, Crybaby, Beauty School Dropout, Greased Lightning and Pink Ladies; MAC eye kohl in Fascinating, ELF Waterproof Eyeliner Pen in Black and Makeup Forever Smoky Lash in Black.

So let's get to business...

Monday, January 2, 2012

Waiiit. It's 2012? Recap of November/December.

I honestly couldn't tell you what I did the last two months.  I worked through the holiday rush at my dream job (Sephora) & even occasionally got to work in "color" (on the floor with clients).  I've met a lot of wonderful people at Sephora and really couldn't ask for a better cast.

Here's a breakdown of what happened in youtube world, as that's the only way I know how to gauge my time...

I kicked off November by trying to give closure to October with videos such as the Halloween tag (with j0hn, even!), followed by a long overdue review of Lensvillage.com (fancy contact lenses here!), and then my favorites video for October (I love...).  Next came a few tutorials, everything from my face routine at that time (little has changed to date), a bright blue look (oh, that Sally Sapphire) and a look I'm particularly happy with (Ghoulies & Redrum Plans).  That was all for tutorials for a while because after that I started working at Sephora & moving into my current apartment.  I uploaded a delayed mailtime about two weeks late and a vlog to explain my absence.  I launched a since closed contest/giveaway and posted a haul of my small amount of black friday purchases (yes, they came from Sephora, ha).  Next came my first holiday tutorial, inspired by the iconic Christmas tree, and one inspired by a lesser know icon, Yo-landi Vi$$er.  I ended the month with cheater's NMM vlog and another tutorial, this time of the frosty lavender & gold variety.

Then came December... I started off by combining two tags into one mega-tag, the Holly Jolly Tag & Wish List 2011 tag until it became.. somewhat epic.  & by epic, I simply mean long.  Another NMM vlog snuck up on me, so I let j0hn do all of the work.  I finally posted my December favorites about a week too late, and got into the holiday spirit with a Rudolph the red-lipped reindeer look for a contest (I didn't even place, by the way).  I finally got the prize video together for my contest just in time for another NMM vlog to creep up.  Then things got too busy & I had to combine a vlog with an impromptu tutorial and OOTD.  I finally found time to do something I'd been waiting for, a Frosty the Snowman tutorial that turned out better than I had hoped.  I finished off the month with some prize mail from Miss Marell and a joint haul video with Mr. 1313.

Now we find ourselves in January.  I want to get up a 2011 favorites video, but I may settle for the top 11 products of 2011 tag.. boo.  I hate settling.  In the meantime, here's this week's NMM vlog, featuring a Ninja!  So what if it's a blender and not a master of martial arts.. it's still a ninja!

See you guys soon, I hope everyone had a fantastic holiday season.

Monday, July 11, 2011

Ponyo Inspired Phototutorial!

Alright guys, this is my first phototutorial, please be patient with me.  =]


This is essentially a complimentary look based off of the popular Miyazaki film Ponyo.  The Madd Models are doing Disney themes this month & I technically cheated.  Disney owns American rights to Miyazaki films, therefore, they're still technically Disney.  I win!  =D

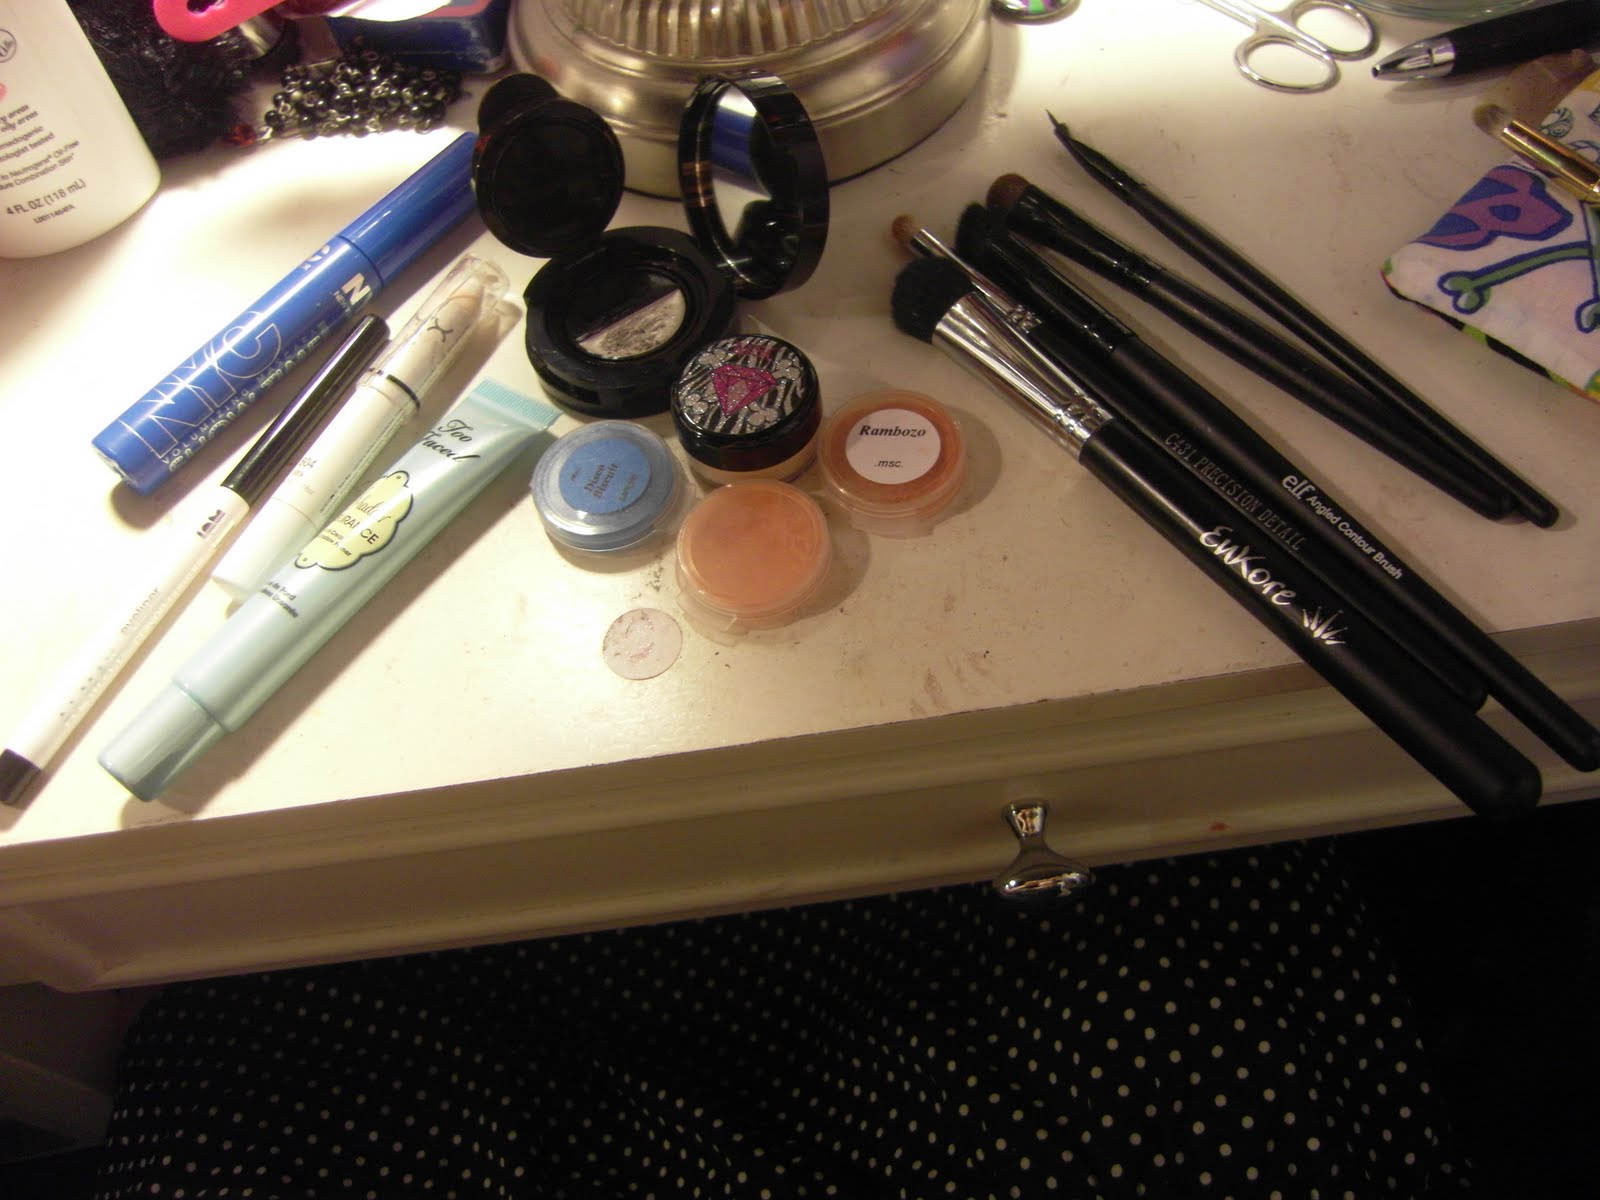
So here's what we'll need today:
From left to right:
NYC Show Time mascara (this is the waterproof one)
Almay eyeliner in Black
NYX Jumbo Eye Pencil in Milk
Too Faced Shadow Insurance
mark. Keep It Going in Entourage (black)
MSC piggiez in Disco Biscuit (shimmery primary blue), Dreamsicle (matte orange), Rambozo (red-toned shimmery orange), and Birf'day Suit (matte cream color)
Fluffy Shader Brush
Pencil Brush
Angled Contour Brush
Flat Shader Brush
Angled Liner Brush

Starting off by priming your lids.


Then apply your white base all over the lid.

Blend the base all over the lid, in the crease, and on the brow bone.

Now you're ready to start applying colors!  This is the fun part.  =]


You're going to start adding Disco Biscuit with the Angled Contour brush to create this shape on your eye.  The color below the eye will come later.  When applying DB, make sure you don't come down on your lid.  A little bit is okay, but too much on your lid will take away from the orange.


This is Dreamsicle.  I absolutely love this color.  It's a matte orange and it's what dreams are made of, haha.  It's applied in the inner corner, half way across the upper lid and across the entire lower lid.


 You're going to pat Rambozo over the entire lid.  Make sure you pat on enough to make it nice and pigmented.  It should come up and out to meet the blue.

Speaking of the blue...

In windshield wiper motions, slowly drag over and build up blue below the orange on the lower lid.

Now you're going to apply Birf'day Suit as a brow highlight.  You're done with eyeshadow, unless you need to touch up anything before moving on to liners & mascara.  I somehow didn't get any steps of this process, so just add the Keep It Going with the angled liner brush to created a small winged look on top.  Use your favorite eyeliner pencil to put black on the lower waterline.  Add your favorite (waterproof, haha) volumizing mascara & you're done!  Also, fun changes you could make would be to use Tiger's Blood by MSC as a liner, or a bright, primary blue as a liner.

The end!  =]  I hope you guys like it!